Quick Start
Let's build a simple full-stack serverless application from scratch using ServerlessInsight. We'll create a simple API that displays "Hello World" in the browser. This guide uses Alibaba Cloud as an example.
Prerequisites
Before you begin, ensure your development environment meets the following requirements:
- ✅ Node.js >= 18.x
- ✅ npm >= 8.x
- ✅ Alibaba Cloud account (with Function Compute FC and API Gateway services enabled)
If you haven't installed Node.js yet, please visit the Node.js website to download and install it.
Step 1: Install ServerlessInsight CLI
Install ServerlessInsight CLI globally using npm:
npm install -g @geek-fun/serverlessinsightVerify the installation:
si --versionIf installed successfully, it will display the version number, e.g., 0.6.12
Step 2: Configure Cloud Provider Credentials
ServerlessInsight needs access to your cloud provider's resources. Taking Alibaba Cloud as an example, you need to configure the following environment variables:
export ALIYUN_ACCESS_KEY_ID="your-access-key-id"
export ALIYUN_ACCESS_KEY_SECRET="your-access-key-secret"
export ALIYUN_REGION="cn-hangzhou"
💡 Tip: You can add these commands to your
~/.bashrcor~/.zshrcfile to avoid setting them for every terminal session.
Supported Alibaba Cloud Regions
Mainland China:
cn-qingdao,cn-beijing,cn-zhangjiakou,cn-huhehaote,cn-wulanchabucn-hangzhou,cn-shanghai,cn-shenzhen,cn-heyuan,cn-guangzhou,cn-chengdu
Asia Pacific:
cn-hongkong,ap-southeast-1,ap-southeast-3,ap-southeast-5ap-southeast-6,ap-southeast-7,ap-northeast-1,ap-northeast-2
Europe & Americas:
eu-central-1,eu-west-1,us-east-1,us-west-1,na-south-1
Middle East:
me-east-1,me-central-1
⚠️ Security Warning
- Keep your credentials secure. Never expose your AccessKey publicly (e.g., on GitHub)
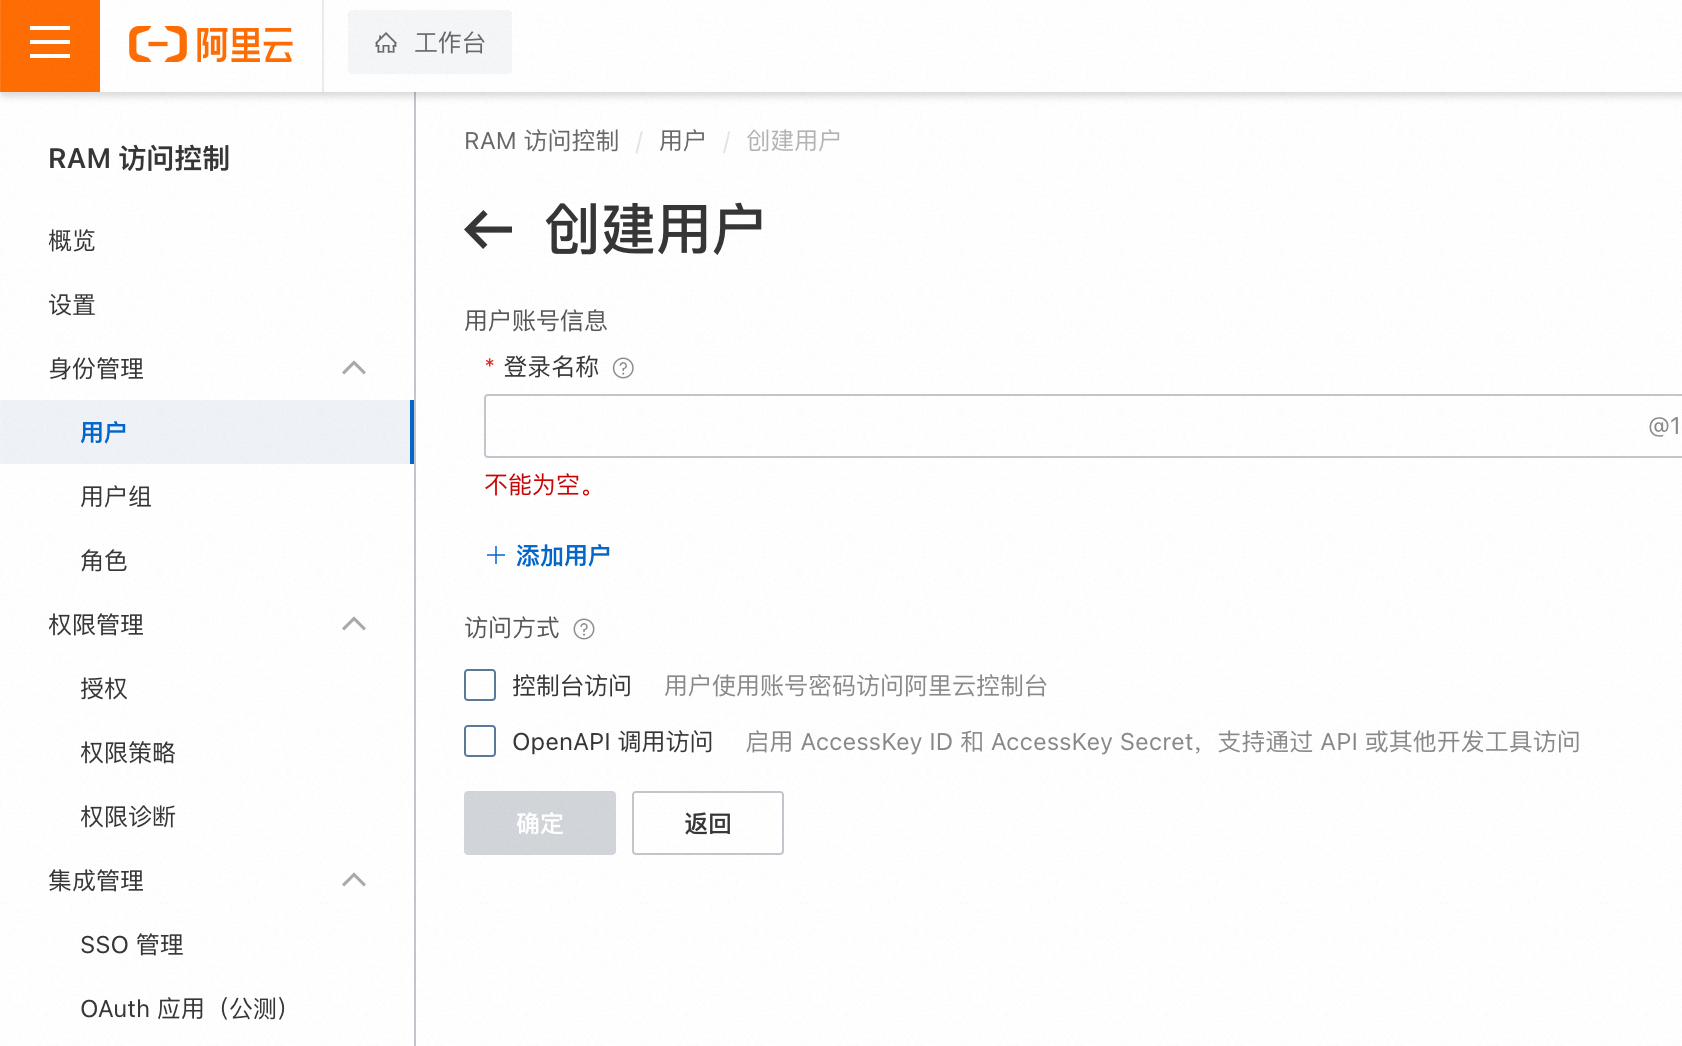
- It's strongly recommended to use RAM user AccessKey for API calls
- Follow Alibaba Cloud Security Best Practices
- ServerlessInsight does not store any provider credentials
Step 3: Initialize Project
Create a project directory:
mkdir hello-world-proj && cd hello-world-projRecommended Project Structure
ServerlessInsight doesn't enforce a specific directory structure, but we recommend organizing your project as follows (TypeScript example):
hello-world-proj/
├── artifacts/              # Packaged application code
│   └── hello-world-api.zip
├── scripts/                # Automation scripts
│   └── package.sh
├── src/                    # Source code
│   └── index.ts
├── tests/                  # Test code
├── serverlessinsight.yml   # ServerlessInsight configuration
├── package.json            # Node.js project configuration
├── package-lock.json       # Dependency lock file
├── tsconfig.json           # TypeScript configuration
└── Dockerfile              # Docker build configuration
Step 4: Configure serverlessinsight.yml
Create a serverlessinsight.yml file in the project root:
version: 0.1.0
provider: aliyun

vars:
  region: cn-hangzhou

stages:
  dev:
    region: ${vars.region}

app: hello-world
service: hello-world-api

tags:
  owner: geek-fun

functions:
  hello_world_fn:
    name: hello-world-fn
    code:
      runtime: nodejs18
      handler: index.handler
      path: artifacts/hello-world-api.zip
    memory: 512
    timeout: 10
    environment:
      NODE_ENV: prod

events:
  gateway_event:
    type: API_GATEWAY
    name: insight-poc-gateway
    triggers:
      - method: GET
        path: /api/*
        backend: hello_world_fn
Configuration Explanation
- version: Configuration file version, currently supports
0.1 - provider: Cloud provider (aliyun/huawei/tencent)
- vars: Reusable variables, can be referenced via
${vars.variableName} - stages: Environment-specific configurations (dev/test/prod), specified via
--stageparameter - service: Service name, a globally unique identifier
- tags: Resource tags for management and cost allocation
- functions: Function Compute configuration
- events: Event trigger configuration
Step 5: Write Application Code
Create an index.ts file in the src directory:
export async function handler(event: any, context: any) {
  return {
    statusCode: 200,
    body: JSON.stringify({
      message: 'Hello World!',
    }),
  };
}
Create a package.json file:
{
  "name": "hello-world-api",
  "version": "1.0.0",
  "description": "Hello World API with ServerlessInsight",
  "main": "dist/index.js",
  "scripts": {
    "build": "tsc",
    "test": "echo \"Error: no test specified\" && exit 1"
  },
  "dependencies": {},
  "devDependencies": {
    "@types/node": "^18.0.0",
    "typescript": "^5.0.0"
  }
}
Create a tsconfig.json file:
{
  "compilerOptions": {
    "target": "ES2020",
    "module": "commonjs",
    "lib": ["ES2020"],
    "declaration": true,
    "strict": true,
    "noImplicitAny": true,
    "strictNullChecks": true,
    "noImplicitThis": true,
    "alwaysStrict": true,
    "noUnusedLocals": false,
    "noUnusedParameters": false,
    "noImplicitReturns": true,
    "noFallthroughCasesInSwitch": false,
    "inlineSourceMap": true,
    "inlineSources": true,
    "experimentalDecorators": true,
    "strictPropertyInitialization": false,
    "outDir": "./dist",
    "rootDir": "./src"
  },
  "include": ["src/**/*"],
  "exclude": ["node_modules"]
}
Step 6: Configure Build Script
Create Dockerfile
Create a Dockerfile in the project root:
# Build stage
FROM node:18.20.3-buster-slim@sha256:95fb3cf1d1ab1834c0fd65cdd2246198662460ae8f982a6cfab187889dd54bbe AS builder
WORKDIR /app

ENV NODE_ENV=development
COPY ./package.json .
COPY ./package-lock.json .
RUN npm install
COPY ./tsconfig.json .
COPY ./src ./src
RUN npm run build

# Runtime stage
FROM node:18.20.3-buster-slim@sha256:95fb3cf1d1ab1834c0fd65cdd2246198662460ae8f982a6cfab187889dd54bbe
WORKDIR /app

ENV NODE_ENV=production
COPY --from=builder /app/dist .
COPY ./package.json .
COPY ./package-lock.json .
RUN npm install --only=production
This Dockerfile uses multi-stage builds:
- First stage: Install dependencies and compile TypeScript code
- Second stage: Keep only necessary runtime files to minimize package size
Create Package Script
Create a package.sh file in the scripts directory:
#!/bin/bash -eux
set -o pipefail

cd "$(dirname "$0")/.." || exit

mkdir -p "artifacts"
rm -rf ./dist ./artifacts/*

IMAGE_NAME="hello-world-api"
docker build -t "${IMAGE_NAME}" .

docker run --rm \
  -v "$(pwd)"/dist:/dist \
  --name "${IMAGE_NAME}-package" "${IMAGE_NAME}:latest" \
  sh -c "cp -r /app/. /dist"

cd dist && zip -r -D "../artifacts/${IMAGE_NAME}.zip" ./*
Make the script executable and run packaging:
chmod +x scripts/package.sh
./scripts/package.sh
After packaging, you should see the hello-world-api.zip file in the artifacts directory.
Step 7: Validate Configuration
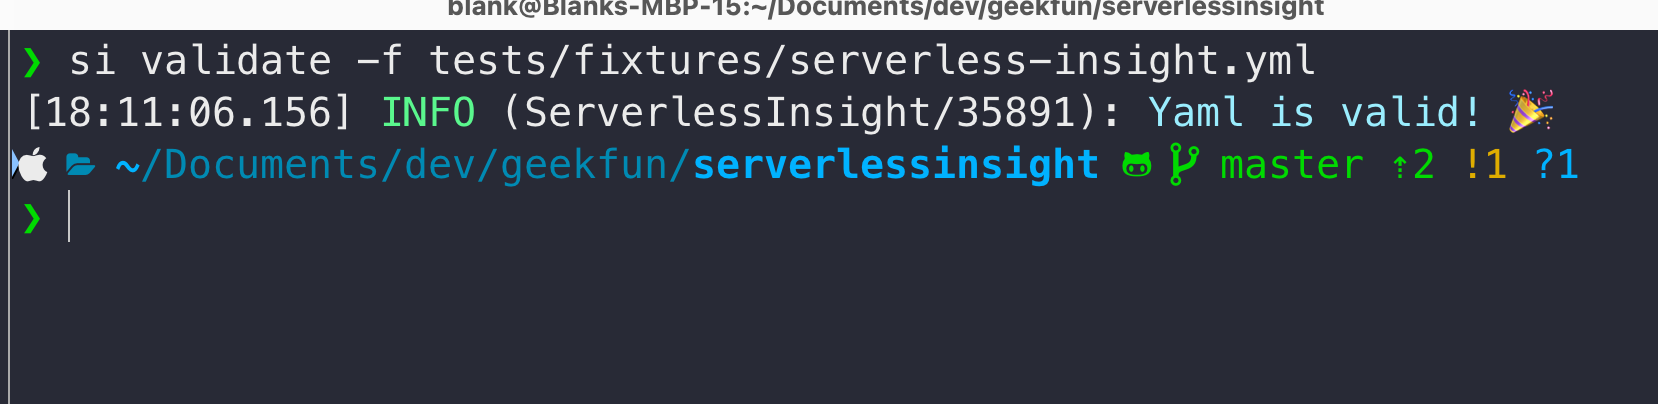
Before deployment, it's recommended to validate your configuration:
si validateIf the configuration is correct, you'll see a success message similar to:
Step 8: Deploy Service
Deploy the service to Alibaba Cloud using:
si deploy --stage devParameters:
--stage dev: Specify deployment environment as development (corresponds tostages.devin config)
After successful deployment, you'll see output similar to:
Deploying service hello-world-api to stage dev
Service hello-world-api deployed successfully
Step 9: Invoke the Service
After deployment, ServerlessInsight will output the API endpoint URL. You can invoke it using:
curl https://<your-api-gateway-url>/api/helloOr visit the URL directly in your browser. You'll see:
{
  "message": "Hello World!"
}
Step 10: Local Development & Debugging
ServerlessInsight supports running and debugging your application locally:
# Basic local run
si local --stage dev

# Enable debug mode
si local --stage dev --debug

# Enable file watch mode (auto-reload on code changes)
si local --stage dev --watch
The local development environment automatically starts all defined resources without configuring any local cloud services.
Step 11: Clean Up Resources
If you no longer need the application, clean up all resources using:
si destroy --stage dev⚠️ Warning
Destroying the stack will delete all declared resources, making the service completely unavailable and losing all data from stateful resources. Ensure:
- Relevant data is backed up
- You confirm these resources are no longer needed
before executing this operation.
Next Steps
Congratulations! You've successfully built and deployed your first Serverless application using ServerlessInsight.
Next, you can:
- 📖 Read the Configuration Guide to learn more about resource configuration options
- 🔧 Check the CLI Reference for more CLI commands
- 💡 Browse Case Studies for real-world application scenarios
- 🌐 Try configuring other cloud providers (Huawei Cloud, Tencent Cloud, etc.)
Troubleshooting
Q: Deployment failed?
Check the following:
- Ensure environment variables (AccessKey, Region) are correctly set
- Verify your Alibaba Cloud account has Function Compute FC and API Gateway services enabled
- Run
si validateto check configuration correctness - Review error logs and troubleshoot based on specific error messages
Q: How to switch between different deployment environments?
Use the --stage parameter to specify different environments:
# Deploy to test environment
si deploy --stage test

# Deploy to production environment
si deploy --stage prod
Define environment-specific variables in your configuration:
stages:
  dev:
    region: cn-hangzhou
  test:
    region: cn-shanghai
  prod:
    region: cn-beijing
Q: How to update a deployed application?
Re-package and redeploy after modifying code:
# Re-package
./scripts/package.sh

# Re-deploy (updates existing resources)
si deploy --stage dev
Q: Which runtimes are supported?
Alibaba Cloud Function Compute supports the following runtimes:
- Node.js:
nodejs20,nodejs18,nodejs16,nodejs14,nodejs12,nodejs10,nodejs8 - Python:
python3.10,python3.9,python3 - PHP:
PHP7.2 - Java:
Java11 - .NET:
.NETCore3.1 - Go:
Go1.x
For more runtimes, please refer to the Alibaba Cloud Function Compute documentation